Monday, 21 March 2011
Unit B Blog Diary assesment 2
Today in class we filled out our planning sheet so it is now ready to be uploaded. I have taken some photos alreadyfor my poster. The photos were of alice and aaron. They were of aarons back and alice's face.
Monday, 28 February 2011
poster

- Is the movie title prominently featured? Is the text easy to read? the title is clear and is to read. but it doesnt really look like a film poster.
- Are the main actors shown? If so, which ones? the characters face is shown with awhite line around him. it doesnt say who the actor is and he doesnt look very familiar.
- What is the design of the movie poster? Does it accurately reflect the mood and tone of the film? the movie poster is very plain just with bod colours yellow and red. it looks as though it may be a comedy but it doesnt really give anything away as to what could happen in the film or what the film is about.
- What other images are included? What do you notice about the framing of the images? the only image in the poster is the guys face and the title. it is all very block and square.
- What text is shown on the poster? Is there a catchy slogan? If so, what does it tell you about the movie's story? there is no slogan or tag line on the poster only the name of the film and a word saying "Romano". the poster doesnt say who is in the film or who the film is directed by.
- Is there any other important information included on the poster? no not at all.
- Why do/don't you think this movie poster is persuasive? i dont think that the movie poster is vey persuasive as it doeant say anything about it to make people want to go and see it. there are no images that show anything about the film.
posters

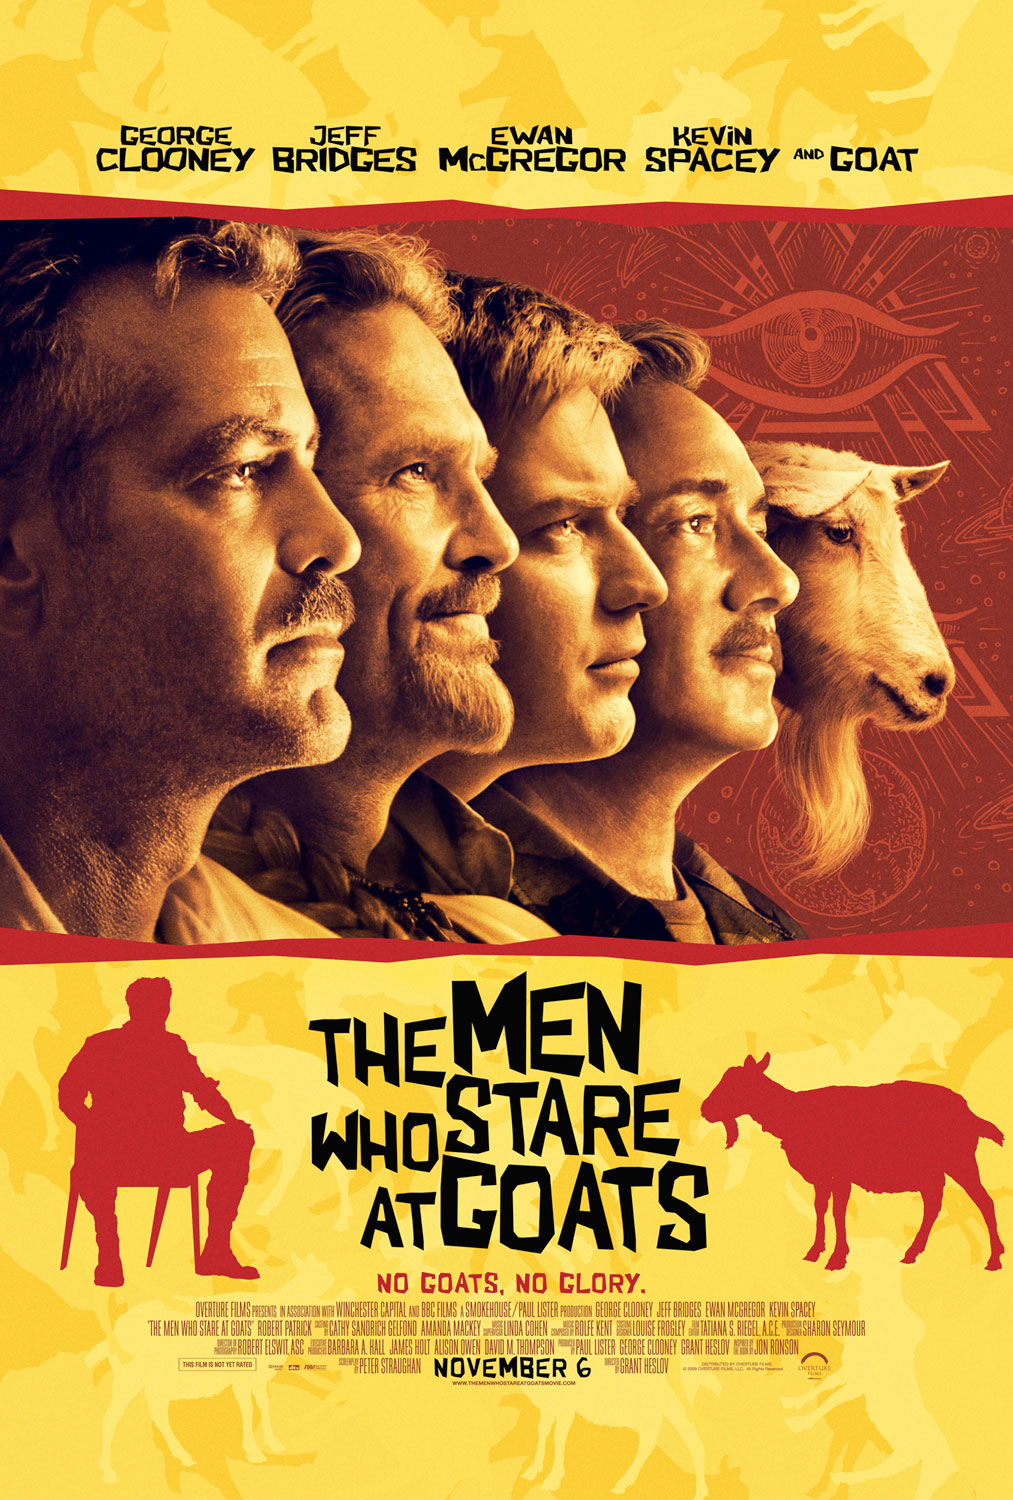
- Is the movie title prominently featured? Is the text easy to read? yes the title is very clear to read and stands out as it is a dark background and title is red.
- Are the main actors shown? If so, which ones? yes the main actors are shown but they are not clear and in the centre they are to the side, it also quite a long shot so you cant really see their faces.
- What is the design of the movie poster? Does it accurately reflect the mood and tone of the film? the mood this poster gives is that it is very scary as the charecters look very scared looking at the shadow on the door. the time at the bottom of the image gives the veiwer the impression that it is filmed with a home movie camera.
- What other images are included? What do you notice about the framing of the images? the poster is a image from the movie so it shows the time at the bottom of the camera and what to expect in the film.
- What text is shown on the poster? Is there a catchy slogan? If so, what does it tell you about the movie's story? there are tag lines saying "what happens when you sleep" and "dont see it alone" these lines will make the veiwer want to watch it even more as they will wanted to know why you should watch it alone.
- Is there any other important information included on the poster? there is the name of the film, a little bit about what happens in the film and where people can see it . it has a little tag line saying "what happens when you sleep" and "dont see it alone".
- Why do/don't you think this movie poster is persuasive? i think that this poster is persuasive because you can see the two main charecters but even though they are not known actors because in the image it is like it is from a home video camara people are likely to want to go adn see it. the fact that you can see the shadow on the door shows that it will be a scary film and people will be intrested in what happens in the film.
Monday, 14 February 2011
Studio Photography lighting set up

Studio Photography
In our studio photography lesson we learnt about studio photography and how the lighting works and where the lights go. We each took turns to take photographs and the other members of our class were in the photograph. Nicola was helping us to take the photographs and use the camara's, we had to frame the image to make sure that you couldn't see anything behind or around the back drop.
Below are my photographs that I took:


 The above photographs were not in frame, so they werent that good.
 This photograph was in frame and was quite good, would have been better if kyle hadn't of sworn.
 This photo is good as you can't see anything else apart from kyle but he isn't is the centre. Nicola said to me that it is good as we could edit it and put writting next to him to make it look better.
Below are my photographs that I took:


Thursday, 10 February 2011
Camara Obsura ( Pringles Tube)
We made a camara obsura out of a pringles tube. We were all asked to bring in large Pringles tubes into our photography lesson. We had to clean out our Pringles tube so there were no crumbs inside, the we had to draw a line around the tube about 2 inches from the bottom. once we had drawn the line we cut along the line so the tube was into 2 pieces. the small part of each tube had a metal end, with a pin we had to make a hole in the middle of the metal. We then put a peice of tissue paper over the smaller end and put the Pringles tube lid onto the tissue paper, we then cut any extra bits of tissue paper that was hanging over the edge off. Other members of our class had to help us with the next bit as we had to hold the bigger end of the tube together with the smaller end and celetape them together. Then we put tin foil around the tube so that no light would get in, we stuck the tin foil down with celetape. You can then hold the tube up to your eye covering any space that will let any light in.


Monday, 7 February 2011


Monday, 31 January 2011
Motion Studies
Today we got into groups and decided how we were going to take pictures usingthe Muybridge technique. We used 4 camaras and had 4 people operating them and took pictures one second per camera to get the technique right. the settings and image sizes had to be set the same. First we had one person walking and then we had three, we also tried it with one person jogging. The camera setting was set at P. We had 8 people in our group, I was taking pictures of what everyone else was doing so we can document about it. Rupert, Jason and Tayab were the subjects and Andy, Andrew, Brandon and Josh were taking pictures in sequence.
Thursday, 27 January 2011
<iframe src="https://docs.google.com/present/embed?id=dhc87q7p_043zqxfhp" frameborder="0" width="410" height="342"></iframe>
<iframe src="https://docs.google.com/present/embed?id=dhc87q7p_043zqxfhp" frameborder="0" width="410" height="342"></iframe>
Thursday, 9 December 2010
Monday, 6 December 2010
Task:3 Evaluation (Unit:9 P3)
Your final Task is to evaluate the work you have just exhibited. You will need to
discuss the following points about your work, the exhibition and the campaign. Use
the following paragraph headings to help you.
1. What are you thoughts on the finished product:? (50 Words Min)
I am very pleased with the way my photos came out. I really like the photos where the lady is going down the rope as it came out the way I had planned it to and looked how I wanted it to look. the photos at the keypad I liked but they werent my favorite as I didnt really know what to do with them and I hadnt really planned where I was going to go and take the photos. The machanic photo I liked but would have prefered it if I had got a far away shot.
2. Does it look how you originally planned? (50 Words Min)
Some of my photos looked how I had planned them the vampire one came out really good I thought as I thought of where I was going to do it on the day so I hadnt really planned it. It was quite difficult to get the shots i wanted in this photo as it was coing out blury and out of focus.
3. What do you think about the qualities of your work? In Focus, Good bad lightetc? (50 Words Min)
I like the lighting in all of my photos. The vampire photo I think the lighting is good as it shows it is on a stage as it is not natural light but it is not in focus as most of the charecters are blury. I dont like that I can see a computer in the background. The photos at the keypad I like but I dont really like the background as you cant really tell where it is meant to be and it isnt really advertising the college. I think the mechancis photo is in focus and you can tell it is mechanics and the charecter fits the role of what it is doing. The lady sliding down the rope is a bit blury and out of focus.
4. Give your ideas about comments from others, eg audience, peers, tutors, client
(50 Words Min)
The comments I got were good and people seemed to like my photos. People said that my photos were"imagineitive" and "carefully taken" also someone like the angle of my keypad photo as you can see the length of the keypad.
Monday, 29 November 2010
the little people project exhibition poster

Monday, 22 November 2010
Exhibition Day
This task is to Print, Frame/mount you pictures in lesson for and exhibition. To plan for this exhibition you will need as a class to think about:
· Where to hold the exhibition
The exhibition is going to be held in T42 on Thursday 2nd December 2010 from 12.30-2.00.
The exhibition is going to be held in T42 on Thursday 2nd December 2010 from 12.30-2.00.
· How it might look
The exhibition may have pictures hanging from the ceiling and pictures on easel's.
The exhibition may have pictures hanging from the ceiling and pictures on easel's.
· Who to invite
People from around the college will be invted to see the exhibition.
People from around the college will be invted to see the exhibition.
· Titles for the Photos
The photos will have their own sub titles but the main tilte will be The Little People Of The College. My photographs that will be at the exhibition are called "A commanding preformance" and "zip lining".
The photos will have their own sub titles but the main tilte will be The Little People Of The College. My photographs that will be at the exhibition are called "A commanding preformance" and "zip lining".
· Health and Safety
There should only be a certain number of people in the room at one time as photos may be hanging from the ceiling and boards will be up with photos on so the more people in the room the more likely it is for people to walk into things. Also wires maybe on the floors because of lights. Tables and chairs could be in the room so people will have walk around minding tables, chairs, and the photographs.
There should only be a certain number of people in the room at one time as photos may be hanging from the ceiling and boards will be up with photos on so the more people in the room the more likely it is for people to walk into things. Also wires maybe on the floors because of lights. Tables and chairs could be in the room so people will have walk around minding tables, chairs, and the photographs.
- Create a Poster for the event
During the exhibition you will need to get feedback on your photos. This feedback will help you when writing your evaluation.
Monday, 15 November 2010
Little People Project

"A commanding preformance".


"Broadening the communication gap"


"Skiming the rim of my car"

"zip lining".

Monday, 8 November 2010
portfolio planning sheet.
Portfolio planning sheet
| Portfolio title: | Little people of the college. |
| Target audience: | People interested in the college. |
| Theme: | Exhibition and marketing |
| Presentation medium: (print/Web/slideshow) | Slide show and a print |
| Portfolio goals and objectives: | ● What does the project aim to do? Advertise the college courses. ● What effect do you want to have on the audience? I want to entice people to the college. ● Is there a question you are exploring? Representing the college in a positive way. |
| Portfolio description: | Explain the types of images the portfolio will contain, such as: ● Close-ups ● Long shot |
| Location and resources: | ● Where will your images be taken? Hair and beauty, business, I am going to be recreating the picture on page 98 in the prospectus, Model F4. Motor mechanics – I am going to get a guy and a small toy car so it looks like he is working on the car. ● What equipment will you need? Camera, models, rope, toy car, . |
Thursday, 4 November 2010
Slinkachu
My 'Little People Project' started in 2006. It involves the remodelling and painting of miniature model train set characters, which I then place and leave on the street. It is both a street art installation project and a photography project. The street-based side of my work plays with the notion of surprise and I aim to encourage city-dwellers to be more aware of their surroundings. The scenes I set up, more evident through the photography, and the titles I give these scenes aim to reflect the loneliness and melancholy of living in a big city, almost being lost and overwhelmed. But underneath this, there is always some humour. I want people to be able to empathise with the tiny people in my works.
In 2008 I started the ‘Inner City Snail’ project, involving the decoration of snails that I find around London. After decoration, the snails are then placed back, free to go about their business in the city. In many ways similar in theme to the 'Little People Project', Inner City Snail can also be seen as a satire of street art and, more generally, our need to cover every available surface of our cities with graffiti, signage and advertising.
http://slinkachu.com/
For the close up pictures the artist may have used macro photography and for the further away shots just took normal photogarphs.


Monday, 1 November 2010
The Decisive Moment


Thursday, 21 October 2010
edited pictures


Monday, 18 October 2010
macro photography


Monday, 11 October 2010
Portfolio title: photo project
Target audience: historions
Theme: historic buildings
Presentation medium: (Web/slideshow)
Portfolio goals and objectives:
• What does the project aim to do?
How old Crawley is.
• What effect do you want to have on the audience?
I would like the audience to admire what history Crawley has.
• Is there a question you are exploring?
What is historic about Crawley.
Portfolio description: Explain the types of images the portfolio will contain, such as:
• Landscape
• Close-ups
Location and resources:
• Where will your images be taken?
Around Crawley town centre.
• What equipment will you need?Camera and Tri-pod.
Thursday, 30 September 2010
mondays lesson


Subscribe to:
Posts (Atom)